Installation
Warning
Docker and Portainer are mandatory to install OnSphere. See prerequisites to install them.
Configure OnSphere
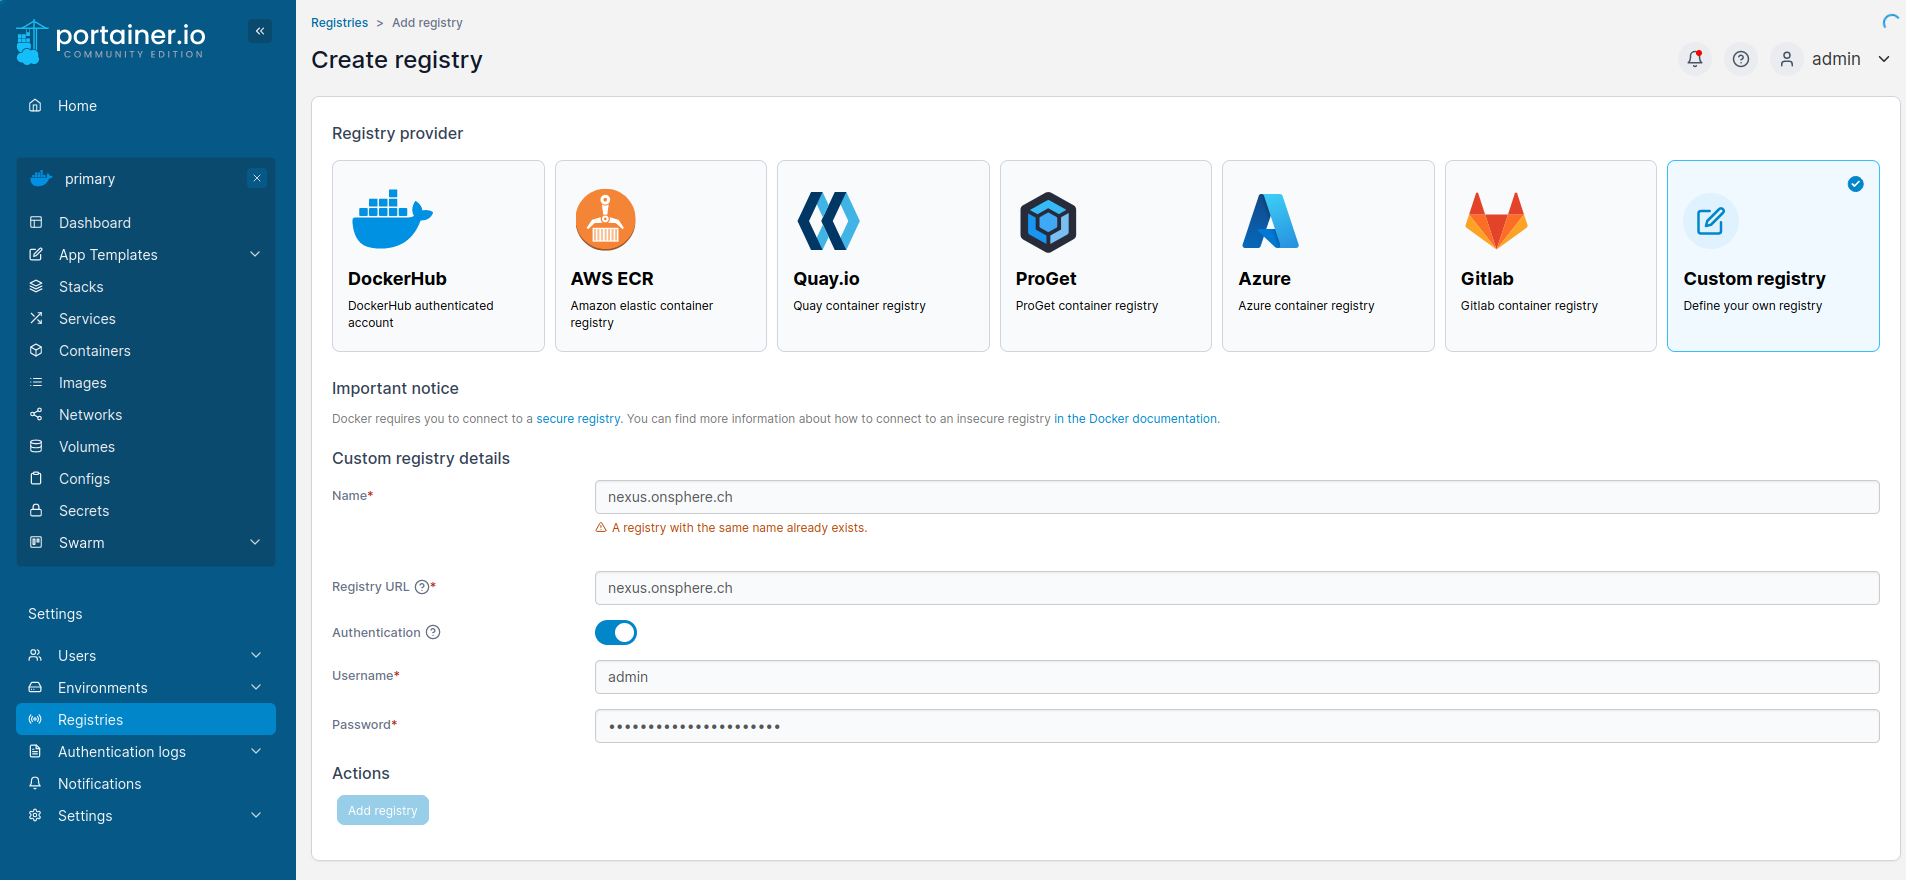
Add nexus.onsphere.ch on the registry
Note
The username and password will be provided to you by Swissdotnet.
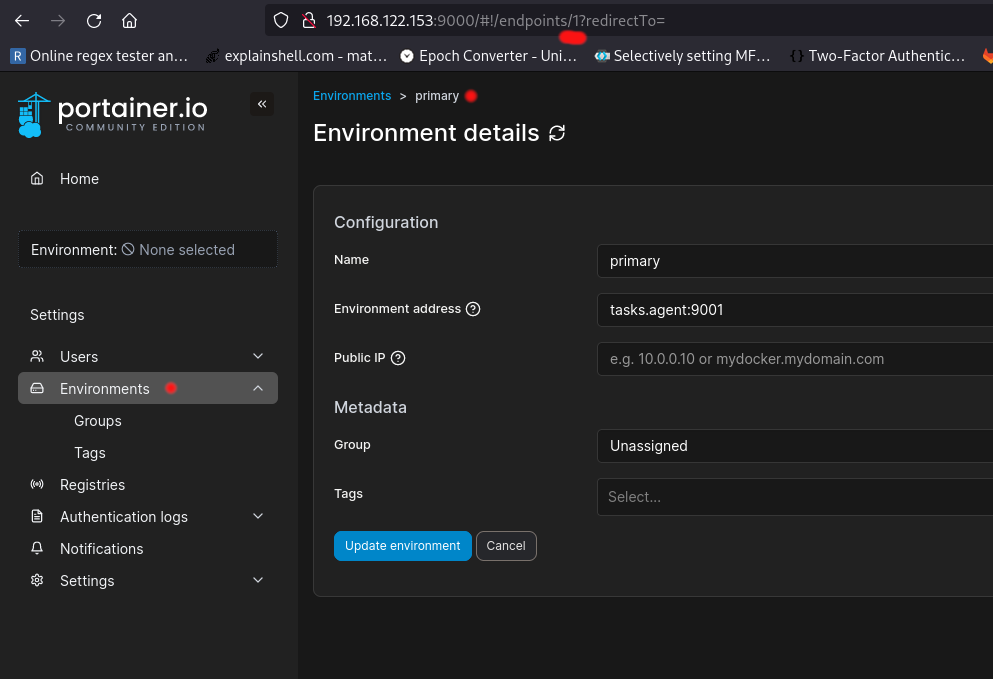
Retrieve the endpoint id
The ID is configured into portainer and can be retrieved in the current endpoint URL.
Create the stack configuration
Each OnSphere stack (a stack is a set of services in a Swarm) has its own json configuration file.
Variable |
Description |
|---|---|
portainerUser |
The username to connect to portainer |
portainerPassword |
The password to connect to portainer |
portainerAddress |
The address to connect to portainer |
endpointId |
The ID of the swarm see how to get the endpoint ID |
stackName |
OnSphere officially supports only one instance by SWARM cluster. However, the system is thought-out to allow multiple ones in future releases which is why this stack id exists. |
Warning
The stack-id must be 20 or less characters long.
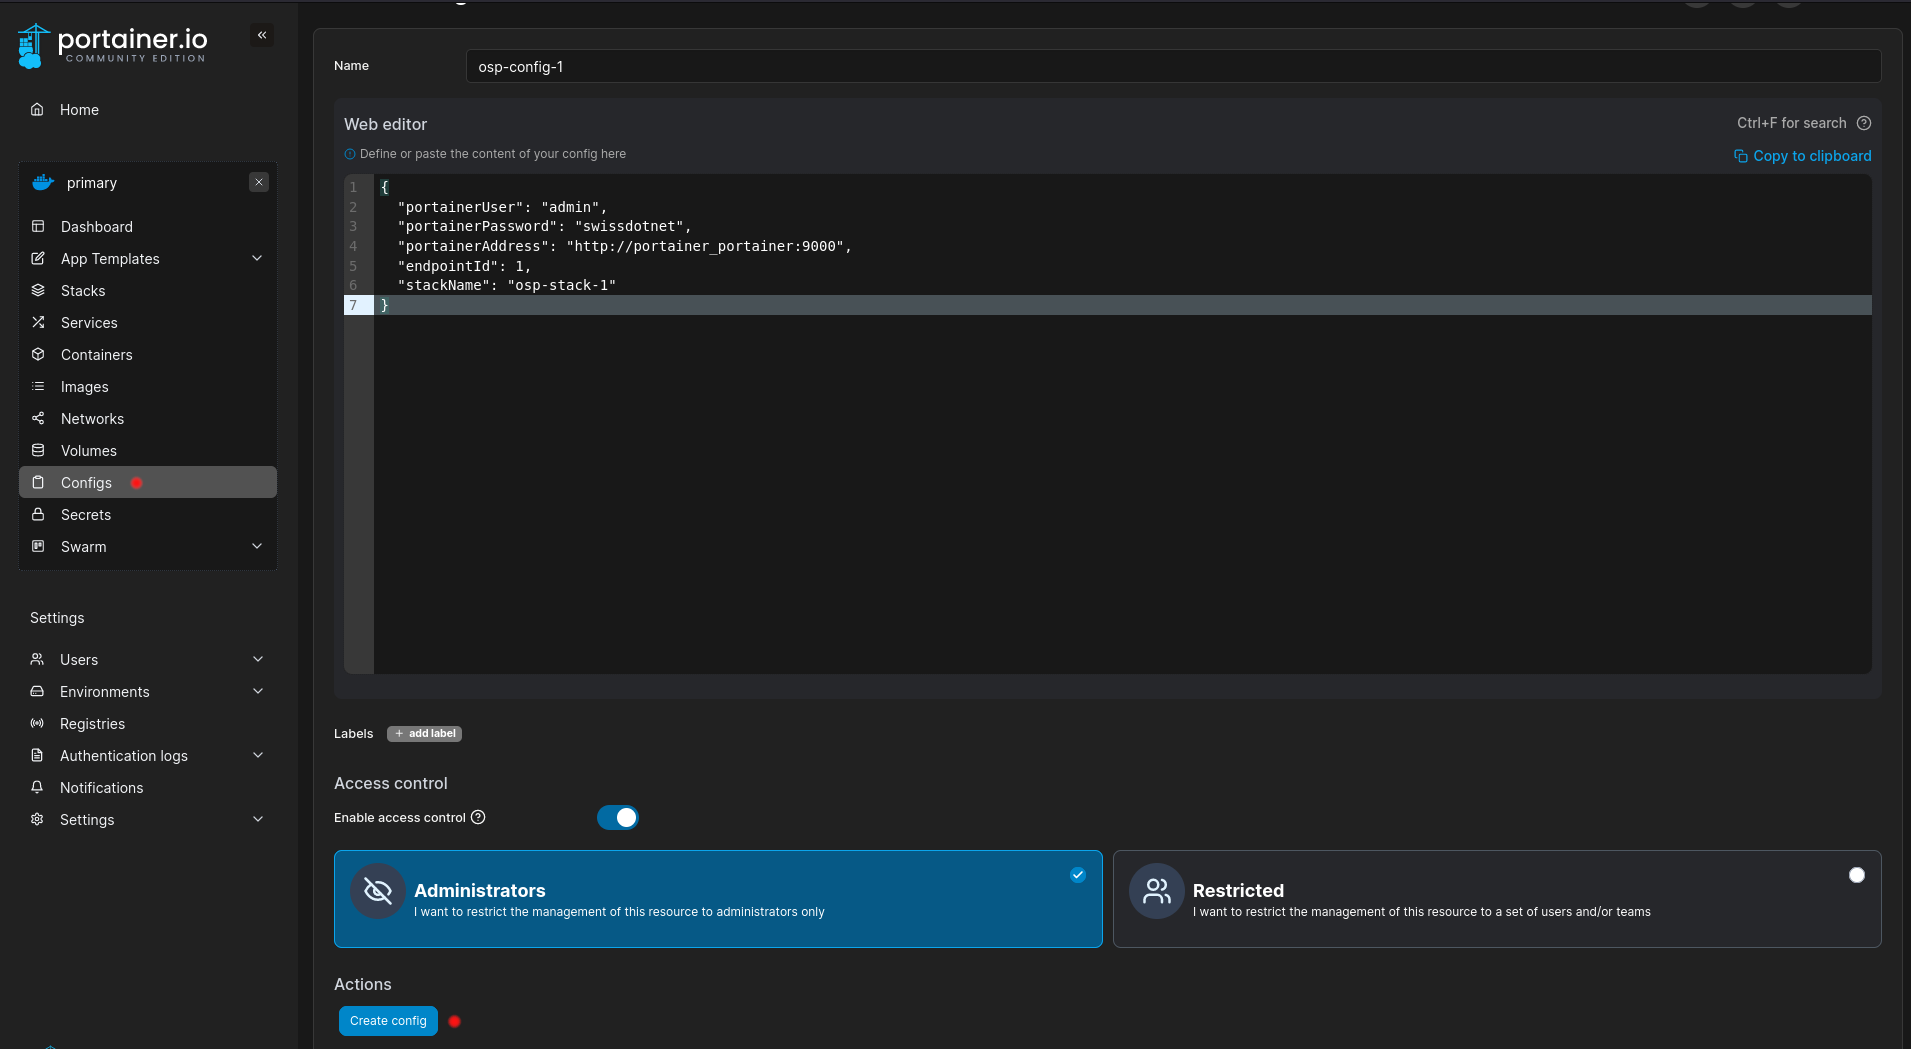
Example of a valid configuration file.
{
    "portainerUser": "admin",
    "portainerPassword": "swissdotnet",
    "portainerAddress": "http://portainer_portainer:9000",
    "endpointId": 1,
    "stackName": "osp-stack-1"
}
The configuration file can be added to docker via portainer
or via the command line
$ echo '{
    "portainerUser": "admin",
    "portainerPassword": "swissdotnet",
    "portainerAddress": "http://portainer_portainer:9000",
    "endpointId": 1,
    "stackName": "osp-stack-1"
}' | docker config create osp-config-1 -
Create the secrets
These secrets will be used to create default user account and password.
Secret name |
Usage |
|---|---|
<stack-name>_admin-user |
User for the admin account of Keycloak, InfluxDb |
<stack-name>_admin-pwd |
The password for Keycloak, InfluxDb, root account of mysql, osp account of the configuration dispatcher |
<stack-name>_database_password |
The password of the account keycloak of mysql |
Create a secret with a password (It can also be created directly from portainer):
$ printf "admin" | docker secret create osp-stack-1_admin-user -
$ printf "password" | docker secret create osp-stack-1_admin-pwd -
$ printf "password" | docker secret create osp-stack-1_database_password -
Deploy OnSphere
Warning
In a docker swarm the localhost/loopback is not connected to localhost. This means usage of localhost:9000 does not work. This is solved by using the system real IP.
Download OnSphere’s default compose file
Adapt the compose file
Set the right version
modules_configuration-dispatcher_main:
    image: nexus.onsphere.ch/osp-configuration-dispatcher:<version>
    environment:
        IMAGE_VERSION: <version>
        IMAGE_REPO: "nexus.onsphere.ch"
Replace the osp-stack-1 reference with the name of your stack if needed.
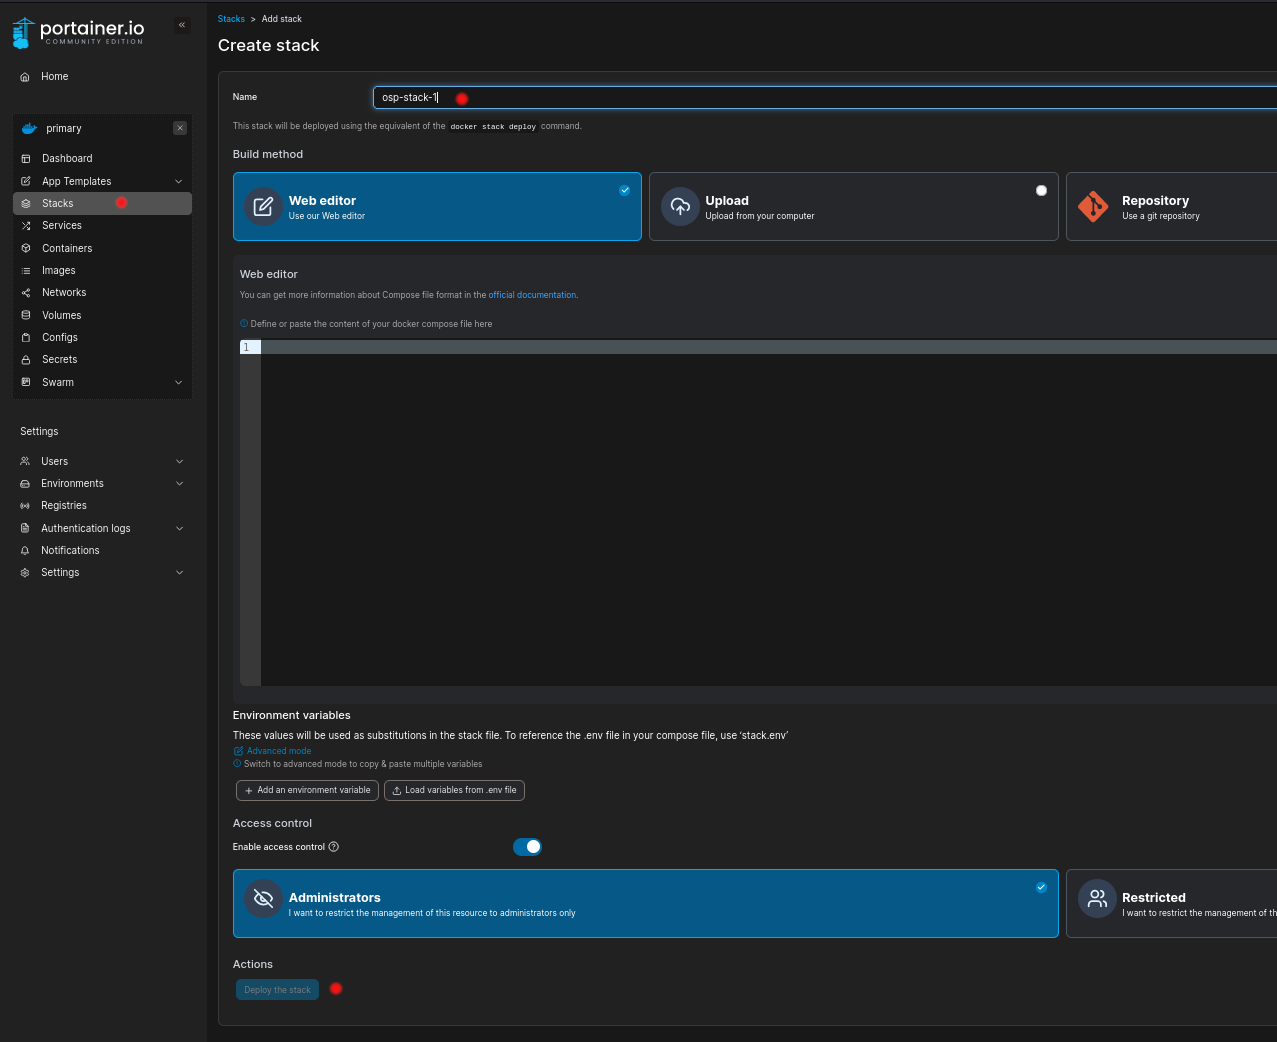
Deploy the stack file
Warning
The stack’s deployment MUST be done with Portainer. Otherwise, the stack won’t be supervised by Portainer.
On the Stacks tab click Add stack. Set the same name as the one defined in the stack’s configuration and copy-paste the default stack configuration content before clicking Deploy the stack.
Warning
The stack name must be the same as the one from the configuration file (stackName).
Wait for the stack to start
When all services containing the stack name are running the stack is fully up.
$ docker service ls | grep osp-stack-1
Clone the configuration
Clone the configuration with the user osp and the password defined on admin-pwd.
$ git clone ssh://osp@<your-stack-ip>:5022/git/onsphere.git
$ cd onsphere
$ git checkout edit
Then you can add the default configuration
$ git merge origin/osp-default-configuration
$ git push
Warning
This step can be skipped IF AND ONLY IF you already have an existing working configuration which will be hooked on your freshly deployed stack.
osp-composer
Overview
The composer is an extension for VSCode aiming at simplifying the creation and edition of OnSphere configuration.
Installation
The osp-composer.vsix is not available on the extensions store yet and needs to be sent on demand. Please ask your OnSphere provider to receive the installer.
Process
Launch vscode
In file/preferences/extensions
Click on the three dots
Add from .vsix
Reload
Recommended vscode extensions
Installation of additional third-party extensions is recommended to improve your user experience.
Lua language server
Lua is a programming language used to customize some modules behavior (e.g osp-snmp-trap, …). Using a language server saves you time as it will report typo and other language errors.
Warning
Knowledge of the existence of a LUA function is linked to the open tab(s). It means that if you have a function used by several scripts, keep it open in a tab to benefit from the auto-completion features.
DrawIO editor
DrawIO is a powerful schematics editor. Multiple extensions allow direct edition of DrawIO files inside VScode.
EDIT csv
The CSV files are used for auto-generated configuration see template playbook documentation.
The usage of an extension is recommended to edit this .csv files, without using excel or calc.