Connect an OPC UA client to read, write and use methods from a server.
Prerequisites
Modules
External Ressource
An OPC UA Server
Checkout branches
git checkout origin/osp-alarms-web-configuration .
git checkout origin/osp-opc-ua-configuration .
git checkout origin/osp-variables-configuration .
In general be sure to have a correctly configured OPC UA server that will accept your connection using the certificates correctly. Also don’t forget to add the certificates inside the certs/external directory.
Objectives
How to read a value on your OPC UA Server
How to write a value on your OPC UA Server
How to use a method on your OPC UA Server
Description
In this tutorial, you will learn how to create an OPC UA client and use it with your OPC UA server. You will only need an OPC UA server to connect to.
Configuration structure
![@startuml
skinparam backgroundColor transparent
package "root/opc-ua" as opcua {
package "device" {
[device.opc-ua] as deviceopc
[value.ospp] as valueDevice
}
package "boolean-value" {
[owner.opc-ua] as booleanValue
[value.ospp] as booleanValueValue
}
package "int-value" {
[owner.opc-ua] as intValue
[value.ospp] as intValueValue
}
package "string-value" {
[owner.opc-ua] as stringValue
[value.ospp] as stringValueValue
}
package "write-output" {
[output.opcua] as writeoutput
}
package "method-output" {
[output.opcua] as methodoutput
}
}
package "root/dashboard" as db {
[dashboard.view] as dashboardview
[dashboard.web] as dashboardweb
}
package "callback-1" as callbackOne {
[callback.ospp] as callback1
[owner.variables] as variable1
[value.ospp] as variable1Value
}
package "callback-2" as callbackTwo {
[callback.ospp] as callback2
[owner.variables] as variable2
[value.ospp] as variable2Value
}
node ospvar as "osp-variables"
node ospweb as "osp-web"
node ospopcua as "osp-opc-ua"
ospweb -[#black]-> db : **Own**
ospopcua -[#black]r-> opcua : **Own**
ospvar -[#black]-> callbackOne : **Own**
ospvar -[#black]-> callbackTwo : **Own**
dashboardview -[#black]-> valueDevice : Subscribe on device status
dashboardview -[#black]-> booleanValueValue : Subscribe on Node value
dashboardview -[#black]-> intValueValue : Subscribe on Node value
dashboardview -[#black]-> stringValueValue : Subscribe on Node value
callback1 -[#black]-> methodoutput : Trigger when needed
callback2 -[#black]-> writeoutput : Trigger when needed
@enduml](../../_images/plantuml-99828ae6bfac97c925a9b8e07d52169f6f168e5b.png)
Steps
Note
The complete example can be checkout using
git checkout origin/example-opc-ua-read-write-methods-using-various-parameters .
Note
If you decided to checkout the origin/example-opc-ua-read-write-methods-using-various-parameters branch, do not forget to replace the IP used in configuration files with your own stack’s IP.
Warning
The setup of the certificates can take some time and be tiresome but is mandatory for any OPC UA production server. Your server certificate have to be placed in the certs/external directory. Of course the server has to accept the certificates of our module and OnSphere.
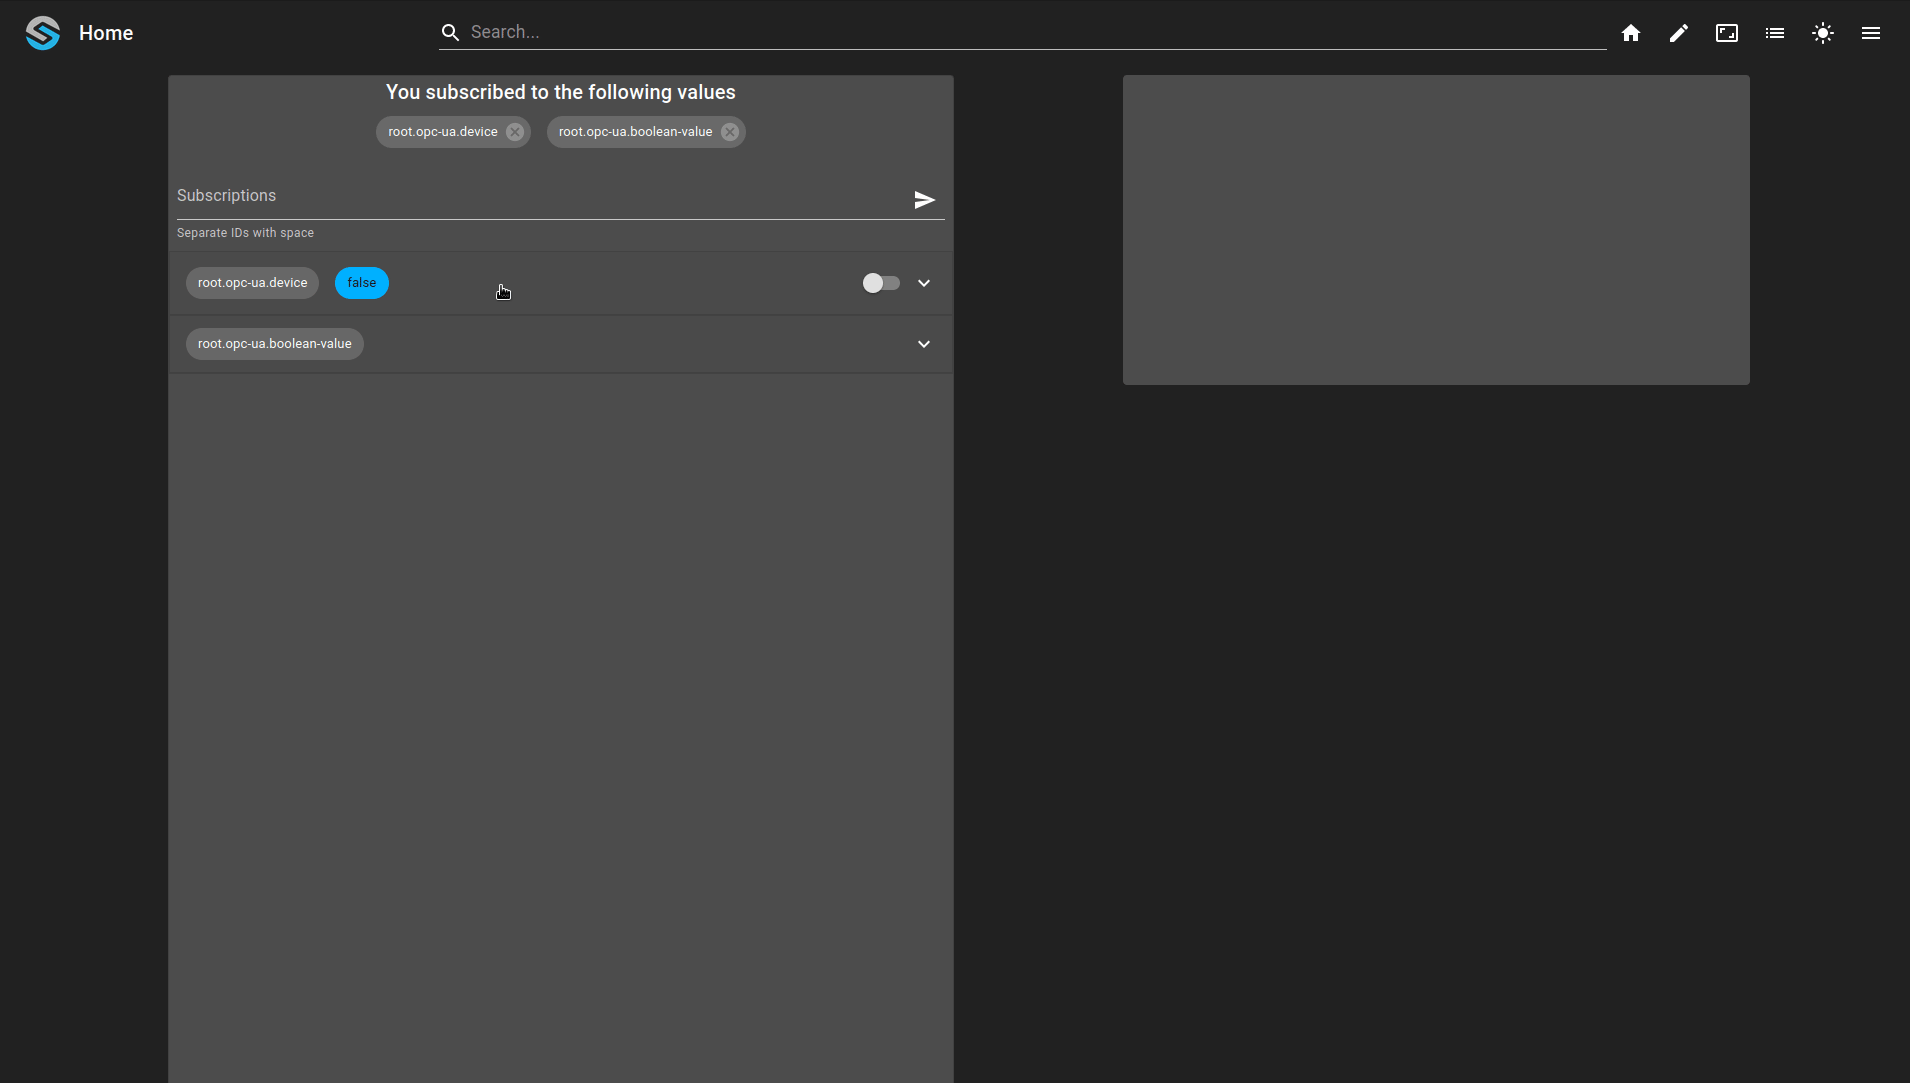
1. Create the dashboard to visualize the values
Create a dashboard with a widget where you can subscribe to values.
root/dashboard/dashboard.view
{
  "configuration": [
    {
      "type": "ValueSubscription",
      "id": "vdwEzlGo",
      "title": "test",
      "valueSubscriptions": {
        "values": [
          {
            "id": "root.opc-ua.device",
            "type": "BOOLEAN",
            "right": "READ"
          },
          {
            "id": "root.opc-ua.boolean-value",
            "type": "BOOLEAN",
            "right": "READ"
          }
        ]
      }
    },
    {
      "valueSubscriptions": {
        "values": [{"id": "root.opc-ua.callback-1","right": "READ_WRITE"}]
      },
      "basicWidgetSettings": {
        "showLabel": true,
        "showTooltip": true,
        "showIcon": true,
        "showValue": true
      },
      "id": "YNu7-D8O",
      "type": "BasicInputOutputValue",
      "title": "testes"
    }
  ],
  "layout": {
    "lg": [
      {
        "w": 5,
        "h": 7,
        "x": 1,
        "y": 0,
        "i": "vdwEzlGo"
      },
      {
        "w": 4,
        "h": 2,
        "x": 7,
        "y": 0,
        "i": "YNu7-D8O"
      }
    ]
  },
  "breakpoints": {
    "lg": 1200,
    "md": 996,
    "sm": 768,
    "xs": 480,
    "xxs": 0
  },
  "cols": {
    "lg": 12,
    "md": 10,
    "sm": 6,
    "xs": 4,
    "xxs": 2
  }
}
root/dashboard/dashboard.web
{
    "moduleId": "modules.web.web-1",
    "title": "Home",
    "description": "OnSphere home",
    "tags": []
}
2. Create different OPC-UA elements
The device :
root/opc-ua/device/device.opc-ua
Note
If you decided to checkout the origin/example-opc-ua-read-write-methods-using-various-parameters branch, do not forget to configure the information relatives to your server (the IP, port, folder and Nodes). If you want to use this as such you can refer to the following github project and use the server example https://github.com/Azure-Samples/iot-edge-opc-plc
{
    "moduleId": "modules.opc-ua.opc-ua-1",
    "ipAddress": "todoreplace",
    "port": 50000,
    "authenticationMethod": {
        "type": "UsernamePassword",
        "passwordProvider": {
            "password": "demo",
            "type": "PLAINTEXT"
        },
        "username": "sysadmin"
    }
}
root/opc-ua/device/value.ospp
{
    "name": "Device status",
    "description": "",
    "type": "BOOLEAN"
}
The two outputs, the first one using a method and the second one using a standard write :
root/opc-ua/method-output/output.opc-ua
{
    "linkedDevice": "root.opc-ua.device",
    "methodIdentifier": "ResetStepUp",
    "methodObjectIdentifier": "Methods",
    "namespaceIndex": 3,
    "type": "Method"
}
root/opc-ua/write-output/output.opc-ua
{
    "type": "Write",
    "linkedDevice": "root.opc-ua.device",
    "namespaceIndex": 3,
    "nodeIdentifier": "SlowUInt1"
}
Different values, representing a Node of different type that we will read every seconds :
root/opc-ua/int-value/owner.opc-ua
{
    "type": "DirectRead",
    "linkedDevice": "root.opc-ua.device",
    "namespaceIndex": 3,
    "nodeIdentifier": "SlowUInt1",
    "pollingFrequency": {
        "value": 1,
        "unit": "SECONDS"
    }
}
root/opc-ua/int-value/value.ospp
{
    "name": "Test value DirectRead",
    "description": "",
    "type": "INTEGER"
}
Creation of a OPC UA subscription on a boolean value that we read :
root/opc-ua/boolean-subscribe/owner.opc-ua
{
    "type": "Subscription",
    "linkedDevice": "root.opc-ua.device",
    "namespaceIndex": 3,
    "nodeIdentifier": "AlternatingBoolean",
    "samplingInterval": {
        "value": 1,
        "unit": "SECONDS"
    }
}
root/opc-ua/boolean-subscribe/value.ospp
{
    "name": "Test value DirectRead",
    "description": "",
    "type": "BOOLEAN"
}
3. Write variables that can handle outputs
Here is an example of a callback using a variable to call an output (the corresponding output is defined below) :
root/opc-ua/callback-1/callback.ospp
{
    "linkedOutputs": [
        {
            "outputId": "root.opc-ua.method-output"
        }
    ]
}
root/opc-ua/callback-1/owner.variables
{
    "moduleId": "modules.variables.variables-1"
}
root/opc-ua/callback-1/value.ospp
{
    "name": "Test val",
    "description": "",
    "type": "BOOLEAN"
}
4. Result of the example
Connect to the frontend and go to the dashboard corresponding to the above configuration. There you can use the search field to subscribe to a value.
Warning
Be aware that you have to correctly configure the certificates (if in use) to be able to connect and subscribe to the values.