Visualize reports
Prerequisites
Modules
Checkout branches
git checkout origin/osp-alarms-web-configuration .
git checkout origin/osp-reports-configuration .
Description
This example shows how to visualize existing reports on a dashboard.
If you don’t have reports generated yet, you should follow this example before going through this one.
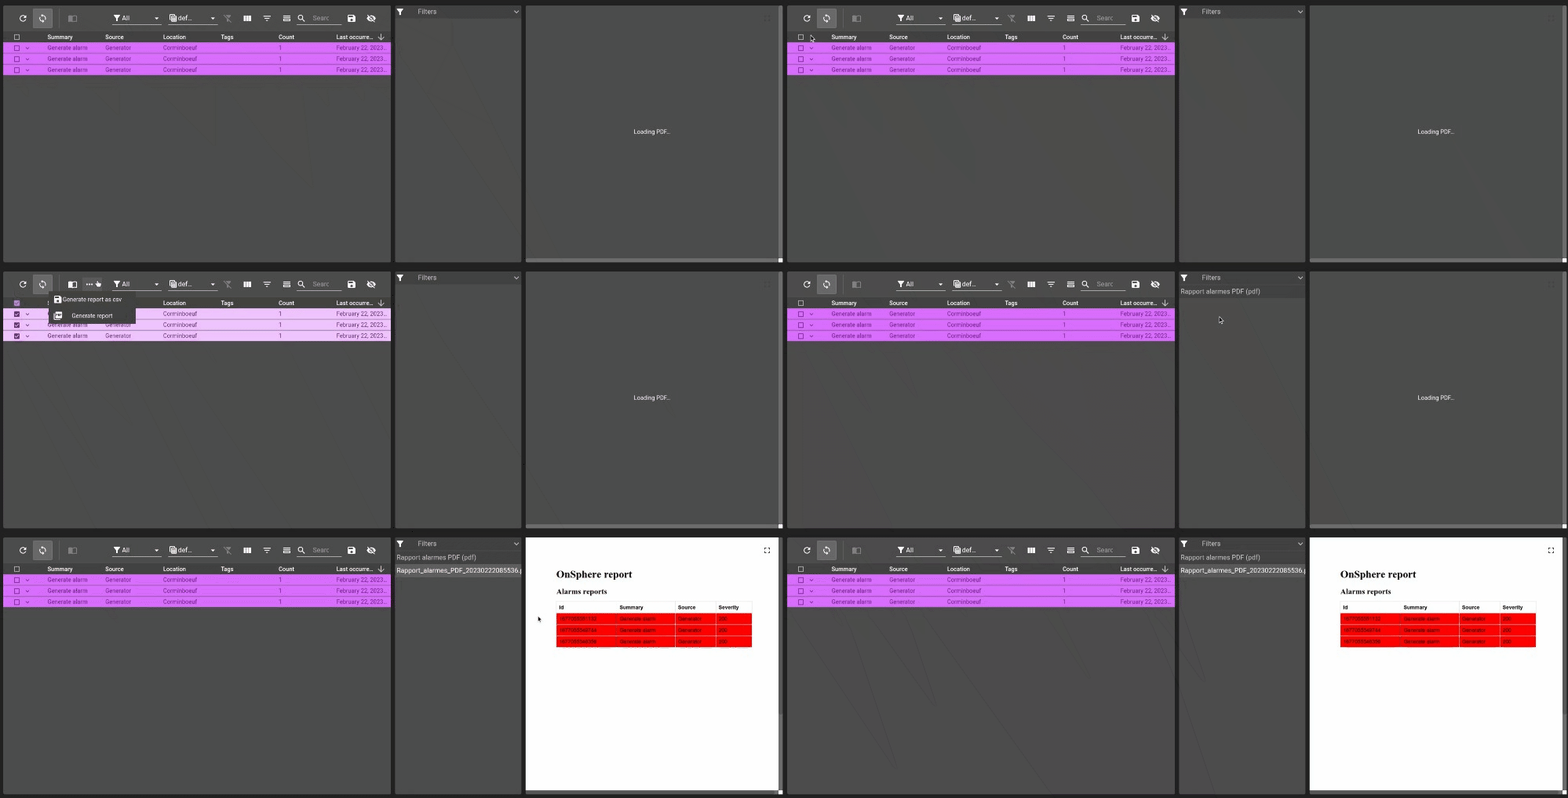
In this example we will create a dashboard with a ReportList and a PDFViewer. The ReportList widget displays the list of all generated reports and the PDFViewer loads and displays a report upon clicking in one of the reports present in the ReportList.
We will also use a menu to allow the download of a report directly from the reports list.
Steps
2. Add a ReportList and PDFViewer inside a dashboard
We can now create a ReportList with default settings and add to it the created menu. Alongside the list, we add a PDFViewer, also with default settings.
We took the alarm table defined in this other example to generate new reports and see the reports list actualize.
root/dashboards/reports-viewer/dashboard.view
{
  "configuration": [
    {
      "type": "AlarmTable",
      "id": "aQEoDuEk",
      "title": "",
      "options": {
        "userPreference": "LOCAL_STORAGE"
      },
      "menuReferences": [
        "root.alarms.menus.reports"
      ],
      "maxMenuHeight": 300,
      "alarmWidgetSettings": {
        "defaultFilter": "root.alarms.filters.all",
        "defaultView": "root.alarms.views.default",
        "resizeMode": "nextColumn",
        "disableFilterUpdate": false,
        "disableToolbar": false,
        "enableAutomaticRefresh": true,
        "disableToolbarTableRefresh": false,
        "disableToolbarTableAutoRefresh": false,
        "disableToolbarJournal": false,
        "disableToolbarColumnShowHide": false,
        "disableToolbarFilterShowHide": false,
        "disableToolbarSummaryShowHide": false,
        "disableToolbarSearch": false,
        "disableToolbarColumnChooser": false,
        "disableToolbarClearFilter": false
      }
    },
    {
      "type": "ReportsList",
      "id": "hrrT9pGM",
      "title": "",
      "menuReferences": [
        "root.reports.osp.menus"
      ],
      "reportsListWidgetSettings": {
        "templateSelect": {
          "type": "ReportsTemplate",
          "multiple": true,
          "limitTags": 1,
          "icon": "picture_as_pdf"
        }
      }
    },
    {
      "type": "PdfViewer",
      "id": "hrrT3JoM",
      "title": "",
      "pdfViewerWidgetSettings": {
        "content": "",
        "display": "one"
      }
    }
  ],
  "layout": {
    "lg": [
      {
        "w": 6,
        "h": 4,
        "x": 0,
        "y": 0,
        "i": "aQEoDuEk"
      },
      {
        "w": 2,
        "h": 4,
        "x": 6,
        "y": 0,
        "i": "hrrT9pGM"
      },
      {
        "w": 4,
        "h": 4,
        "x": 8,
        "y": 0,
        "i": "hrrT3JoM"
      }
    ]
  },
  "breakpoints": {
    "lg": 1200,
    "md": 996,
    "sm": 768,
    "xs": 480,
    "xxs": 0
  },
  "cols": {
    "lg": 12,
    "md": 10,
    "sm": 6,
    "xs": 4,
    "xxs": 2
  },
  "rowHeight": 150
}
3. Generate reports and visualize them on the PDFViewer
Once a report is generated, the ReportList widget is automatically updated. Upon choosing a report, the PDFViewer will load it.

Add this example in your configuration
You can directly use the following command to add this example into your configuration :
git checkout origin/example-dashboard-reports-viewer .